Jupyter notebook
Jupyter notebook allows a user to interactively code, execute and visualize programs inside of a web browser. While the notebook supports multiple languages, most often it is used with Python.
We offer several ways to access Jupyter notebook:
- Jupyter notebook on a desktop or interactive node - Direct notebook
- Jupyter notebook on a cluster compute node - OnDemand notebook
- Jupyter notebook on a cluster compute node - Notebook with SSH tunneling
- Jupyter notebook without need to access interactive or cluster node - Jupyterhub notebook
The appropriate notebook choice depends on feature and workload needs, summarized in the grid below
| Low compute power demand | High compute power demand | |
| Run locally | Direct notebook | Direct notebook only on dedicated desktop or interactive node |
| Run elsewhere | Jupyterhub notebook |
Jupyter notebooks via ondemand are the most appropriate for class use.
See section Using Jupyter Notebook for an example.
Direct notebook
A Jupyter instance can be launched on any Linux machine that runs Python and has the Jupyter package installed. This includes CHPC's built Python packages.
This approach is recommended for those with dedicated interactive nodes or desktops who want the choice of the Python (or other language interpreters in the notebook), or for lightweight programming on general interactive nodes.
To get the Jupyter notebook running:
- Use FastX to open a remote desktop session on an interactive node (e.g.
frisco1.chpc.utah.edu). - Open a new terminal window, and there load a Python module and launch the notebook. (Note: the "--browser=" flag allows you to select the web browser to use. Google
Chrome works reliably with all versions of python in both the general environment
(clusters notchpeak, kingspeak, lonepeak, and ash) as well as the protected environment
(redwood cluster). Other browsers such as Firefox and Konqueror frequently generate
errors, or fail to connect to jupyter):
$ module load python/3.12.4
$ jupyter notebook --browser=/usr/bin/google-chrome
[I 14:05:23.164 NotebookApp] Serving notebooks from local directory: /home/....
[I 14:05:23.164 NotebookApp] 0 active kernels
[I 14:05:23.164 NotebookApp] The Jupyter Notebook is running at: http://localhost:8888/
[I 14:05:23.164 NotebookApp] Use Control-C to stop this server and shut down all kernels (twice to skip confirmation). - A web browser window opens in the remote desktop with the initial Jupyter session.
- To finish the session, close the web browser and Control-C the Jupyter application in the terminal.
Notebook with SSH tunelling
Another possibility to run a Jupyter notebook as a job is to launch an interactive job, set up an SSH tunnel to the compute node that the job runs on from a client machine, and then run the notebook in a web browser of the client machine. This works on all CHPC clusters but requires more work to set up than the OnDemand route. There are two ways one can do this. One is to run the web browser that displays the Jupyter notebook on a local machine (e.g. your laptop), this requires a double SSH tunnel from your local machine to CHPC cluster interactive node to cluster compute node. The other way is to open a FastX connection to an interactive node, run the web browser client there, and single step SSH tunnel to the compute node where the job runs.
Double SSH tunnel from local machine
- Open a FastX terminal to a cluster interactive node (e.g. lonepeak1).
- In the terminal window, start an interactive job
[lonepeak1]$ salloc --time=1:00:00 --ntasks 1 --nodes=1 --account=chpc --partition=lonepeak
- Once job starts and terminal prompt is back, record the host name of the node where
the job runs
[lp064]$ hostname -f
lp064.lonepeak.peaks - Start the Jupyter notebook on the compute node
[lp064]$ export XDG_RUNTIME_DIR=""
[lp064]$ ml python/3.12.4
[lp064]$ jupyter notebook --no-browser --port=8889 - On your local machine, open a terminal window and start the double SSH tunnel
Note that you will be prompted twice for your password, once for the interactive node, second time for the compute node.[lonepeak1]$ ssh -N -L 127.0.0.1:8888:127.0.0.1:8889 -J u0123456@lonepeak1.chpc.utah.edu u0123456@lp064.lonepeak.peaks
- In your local machine's web browser, type http://localhost:8888/tree to connect to the remote notebook.
Single SSH tunnel from cluster interactive node
- Open a FastX remote desktop to a cluster interactive node (e.g. lonepeak1) and open two terminal windows.
- In a first terminal window, start an interactive job
[lonepeak1]$ salloc --time=1:00:00 --ntasks 1 --nodes=1 --account=chpc --partition=lonepeak
- Once job starts and terminal prompt is back, record the host name of the node where
the job runs
[lp064]$ hostname -f
lp064.lonepeak.peaks - Start the Jupyter notebook on the compute node
[lp064]$ export XDG_RUNTIME_DIR=""
[lp064]$ ml python3
[lp064]$ jupyter notebook --no-browser --port=8889 - Now switch to the other terminal window (on the interactive node), and start the Google
Chrome browser in the background. As of July 2019, we have seen problems with using
Firefox
[lonepeak1]$ google-chrome &
- Start the SSH tunnel (on the interactive node)
[lonepeak1]$ ssh -N -L localhost:8888:localhost:8889 lp064.lonepeak.peaks
- In the web browser, type http://localhost:8888/tree to connect to the remote notebook
- To cancel the session, press ctrl-c in both terminal windows. One will cancel the notebook and the other will cancel the ssh tunnel.
Notebook alternatives
For people without a CHPC account, we suggest looking at Jupyter notebook hosting alternatives such as https://mybinder.org, which we are using for CHPC’s Introduction to Python training series, and Google Colab, https://colab.research.google.com. Google Colab can also be set up to run on CHPC in compute nodes.
For CHPC users who want to run a Jupyter notebook with access to their CHPC file systems, please either use the direct notebook option mentioned above or use the CHPC ondemand server, ondemand.chpc.utah.edu. For more information see our ondemand webpage.
Jupyter via ondemand can be used for classroom support. If you are interested in using CHPC resources for a class, please use the "Add group" feature on the CHPC Portal for your class. If you have questions or concerns about the process, we'd be happy to help; please email helpdesk@chpc.utah.edu.
Using Jupyter Notebook
After starting the notebook you will see your home directory. To open a new notebook,
use the New button and choose the appropriate language.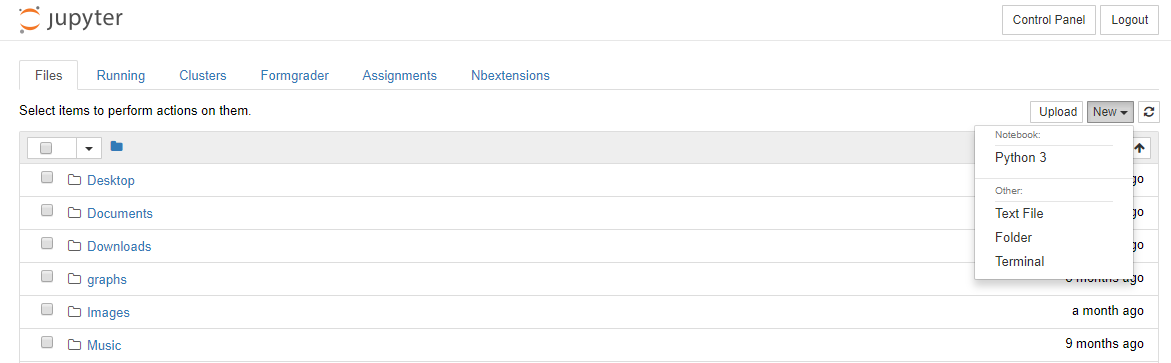
In the new notebook, write your code, e.g.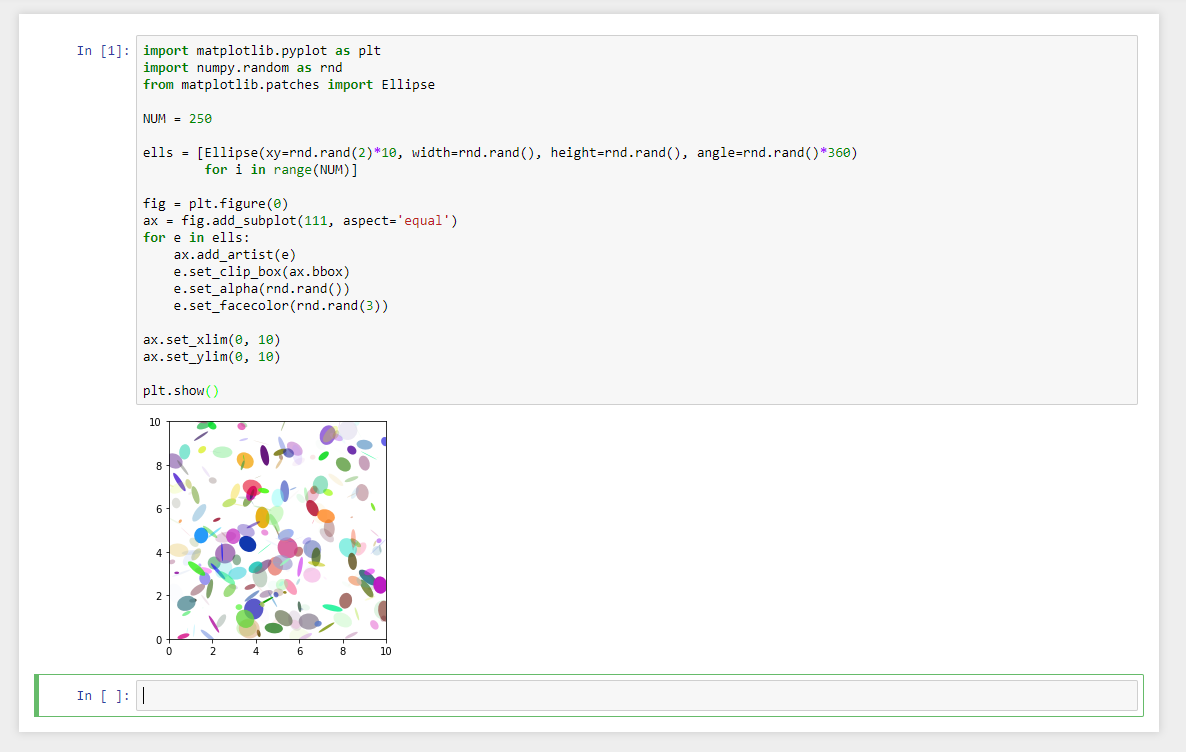
For a short list of Jupyter Notebook commands and features, see our Reference Guide.
Using Jupyter with Anaconda Environments
It is not unusual to install python code and Jupyter notebooks as part of an Anaconda environment, or to develop new python code and notebooks within an Anaconda environment, but sometimes it is unclear how to make this code work with your Jupyter installation. The trick to make Jupyter work with an Anaconda environment is to install the ipykernel package within the environment, and then to register that kernel with the Jupyter system. Follow these steps to do this:
- Use conda to activate your environment: conda activate your_env_name
- Use conda again to install ipykernel: conda install ipykernel
- Run python to register this Anaconda environment as a Jupyter kernel: python -m ipykernel install --user --name your_env_name --display-name "Python (your_env_name)"
If you then re-start your Jupyter session, the kernel or kernels you have registered will appear in the "New" drop-down menu.
Converting Jupyter Notebooks to Other Formats
The Jupyter Lab and Notebook environments can save and export notebook files to other formats (for example PDF) but this process is not completely reliable. A more reliable technique is to use the quarto and texlive modules to perform the conversion. For example, to convert a notebook file named "my_homework.ipynb" to PDF, open a terminal window, change directory to the location of the notebook file, and issue the following commands:
module load quarto texlive
quarto render my_homework.ipynb --to pdf
Quarto will convert the document first to LaTex and then to a PDF file named "my_homework.pdf".